


I awoke this morning to the rumblings of a thunder storm and the excitement of a day in our jammies; the first day of Spring Break! As I think about our upcoming week, I commit to making this not just another Spring Break because it isn’t. This is a week in which we remember Christ’s suffering on a cross and His resurrection. Jesus knew this was His last week in earth. If you knew it was yours, what would you do? Doesn’t it make you want to read the scriptures of that final week to see what Jesus did? I’ve been rereading Max Lucado’s book called “The Final Week of Jesus” which walks you through just that. So this is my challenge, how can I prepare my heart and home to receive and see clearly all God wants to teach us this week? I have planned a different activity for each day of this Holy week. Today we start.
DAY 1 – Simplify
I was inspired by an idea on Pinterest this morning called “Get rid of 100 things this weekend”. Yes! Simply our surroundings. Clear the clutter so that we can breathe…think…hear. This is where our family is starting; a practical exercise in simplifying.

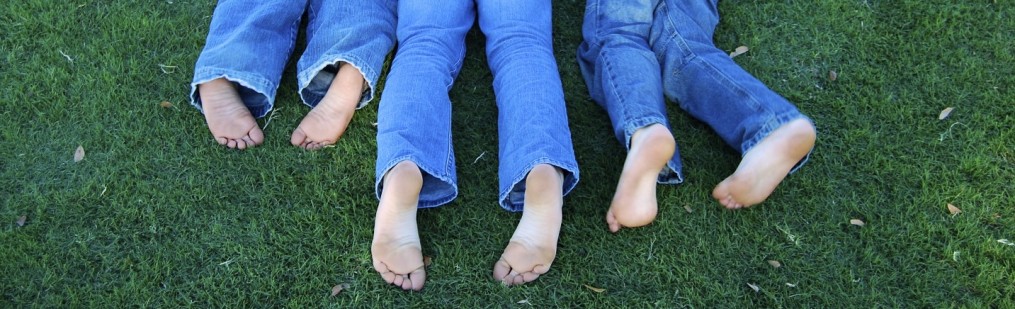
I explain to my crew that God desires to be seen by us. He wants to be heard but sometimes our crowded and cluttered lives distract us from His voice. We discuss the idea of simplifying; cutting back the stuff to make more room for God. I propose the challenge. Can we each find 100 things to give away? It can be clothes, toys, books, toiletries. We set up bins for donations, consignment and garbage. We crank the music and begin. My 10 year old daughter, Lily, takes a mad dash for her room throwing piles of clothes and books into the donations bin. I rescue some classics and sentimentals but am impressed with the enthusiasm. My 7 year old, Campbell, approaches it from what the recipients would want to recieve. He immediately begins writing a note and coloring a picture for them which he counts as #1 of his 100. My youngest has no interest in anything except playing with the neglected toys that have just been put in the donate bin. One item put in, 2 removed. 500 items starts to sound like a big number and I begin wondering if we should have aimed for 100 total, not per person. Then I remember my overflowing closet and feel convicted. We got this.
DAY 2 Palm Frond Crosses
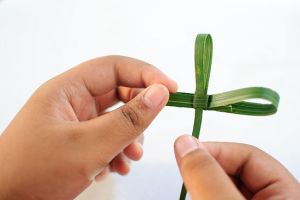
It’s Palm Sunday, a special day in our home because it is the source of our son’s namesake. When I was pregnant with my 3rd, with no agreed upon baby name, Lily came home from school waving a palm frond. She explained that the people waving palm fronds as Christ entered Jeruselum were called “palmers”. I went into labor on Easter and our Palmer was born the next day. To day we are making crosses out of palm fronds. Now I do feel compelled to tell you that Palmer thought the crosses were more fun as guns. Bang Bang. Here is a great tutorial:
How to Make aPalm Frond Cross Tutorial:
Day 3 – Crown of Thorns
“The soldiers wove thorn branches into a crown and put it on his head. “Matthew 27:29 “They mocked him and spit on him”.
When I think of a crown of thorns, I like to imagine it differently. I don’t like to think about the blood dripping down Christ’s cheeks or the piercing sensation of constant pain. I ask what it means to suffer at school? Has anybody ever spit on you, hit you, insulted you? How did you feel? Why did Jesus have to suffer? We pull up grass from the ground and weave it together into a crown. We pierce it with toothpicks. The kids are both eager and reluctant to put on the crown. A few minutes later, Campbell hurts his elbow. He comes to me sprinting. There was nothing I could do, but he wanted me to know his suffering. We are each going to experience periods of suffering. I take comfort knowing that God knows my human suffering first hand. “You keep track of all my sorrows. You have collected all of my tears in a bottle and recorded them.” Psalm 56:8


Day 4 Beauty for Ashes
About a month ago the forest immediately behind our home caught on fire. We watched as the fire moved from hundreds of yards away onto our property. As it crossed over our brick wall, I was advised to grab what I could. A reverse wind came blowing the flames in the other directions permitting just enough time for the firemen to push it back. For a week the tall pine trees sizzled and smoke filled our home, but we were thankful.
For today’s project, my husband and children hopped the brick wall towards the burnt remains. They found the perfect logs.

With rope and humility, Jimmy ties the ash stricken trunks together. The mid-afternoon sky turns black. The skies thunder and gusts of wind begin blowing. We all race inside later learning tornadoes were passing over our area. We talk about the parallel between our afternoon and that Friday in Jerusalem so many years ago when the skies turn black and the earth shook as Christ died. This cross, made from the ashy wood which took the brunt of the fire that could have destroyed our home,is now a physical representation of not only God’s sovereignty over our family but the freedom to live because we are not bound by our sin.

|
||
 Click here for a new Holy Week post”Stinky Feet of Passover”
Click here for a new Holy Week post”Stinky Feet of Passover”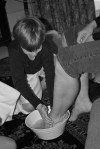


![20s-bridal-hair-jewelry[1]](https://thehouseofhendrix.com/wp-content/uploads/2013/03/20s-bridal-hair-jewelry1.jpg)


 tutorial coming soon


 What do you get a parent when they have a milestone birthday? My father was turning 65 and nothing seemed right. What gift could possibly communicate how much he means to me? There isn’t one. When I began reminiscing of him in my life, I started laughing and then crying at my memories. So I started writing them down and before you know it, I had 65 of my favorite memories. They ranged from “When you would take us to the grocery store for junk food trips” to “Our fishing trip to the Bahamas”. I typed them, printed them on a really thick cardstock, and then cut them into stripes. I bought a neat leather and wood box from TJ Maxx and stuck them inside. After his birthday dinner, we went around and took turns reading them. It lasted hours as we reminisced together.